LIMA Showcase
This page shows a few of the newer features of the LIMA mudlib. These are all on top of:
Centralized natural language parsing (Zork like commands for players).
Socials use the natural language parsing, and are easy to extend. (The soul is huge).
Wizards have featureful shells including full unix globbing (ls *.[ch]), command piping / redirection, etc…
Inline documentation.
Distributed support.
Very modular, with clear code.
Support for Intermud-3.
Modal input, and fully featured interactive shells.
Real, secure security authored by Ellery @ TMI-2 (Reimer Behrends).
Emphasis on player usability: better news, channels, menus, etc… than any other mudlib
Easy to build menus, easy to write socials, etc…
A menu driven admin tool to ease routine administration tasks.
Dynamic modern layout
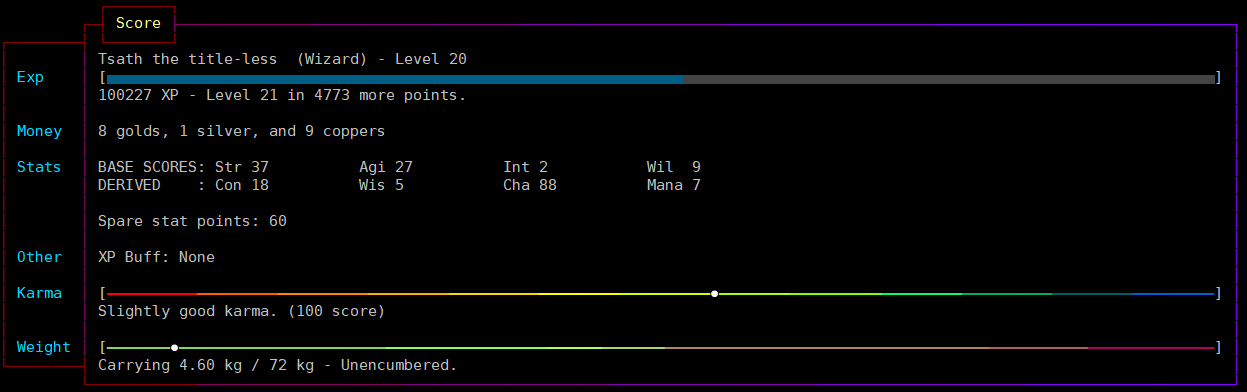
LIMA supports fancy frames player commands, and include both horizontal and vertical headers. The frames can be themed in different colours and styles using the frames command, either using UTF-8 characters or simple ASCII characters.
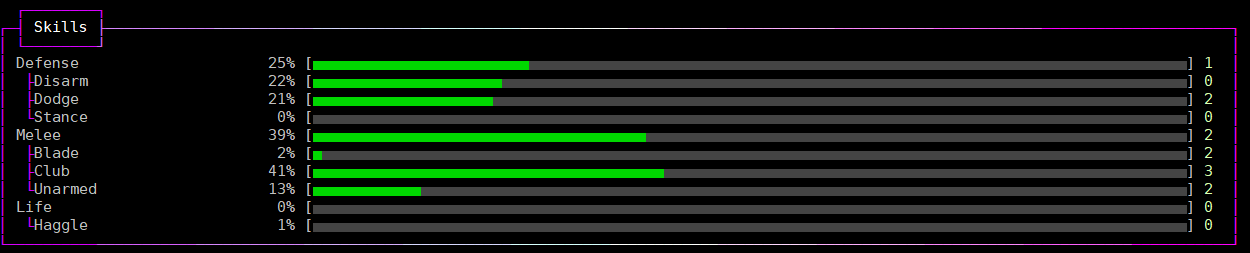
The frames will automatically fit the width of your screen or whatever you select using the width player command.
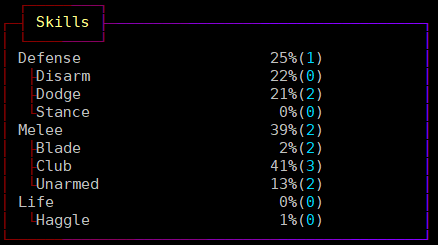
Depending on the command, some commands may adopt their internal layout depending on the width of your screen. The frames also support using auto-scaling widgets for illustrating progress, balance between good and bad and more.
If your MUD client does not support UTF-8, you will automatically receive the ASCII version. Several style options can be selected, like ‘single’, ‘lines’, ‘ascii’, ‘double’, but also ‘none’ to remove all frames, e.g. if you are using a screen reader they might not be pleasant on your ears.

Developer information
Each frame defines accent and warning colours that can be used as standard when doing layout. The frame library will do a lot of the work for you, but you have to check yourself when the width is so wide/slim that the layout needs to change.
Example of code:
set_frame_title("Mail Groups");
set_frame_left_header();
set_frame_header(header);
set_frame_content(output);
out(frame_render());
Or if you have a list of simple things:
object *bodyobs = bodies();
set_frame_title("Who");
// Frame headers are automatic.
frame_add_column("Name",bodyobs->query_name());
frame_add_column("Level",bodyobs->query_level());
out(frame_render_columns());
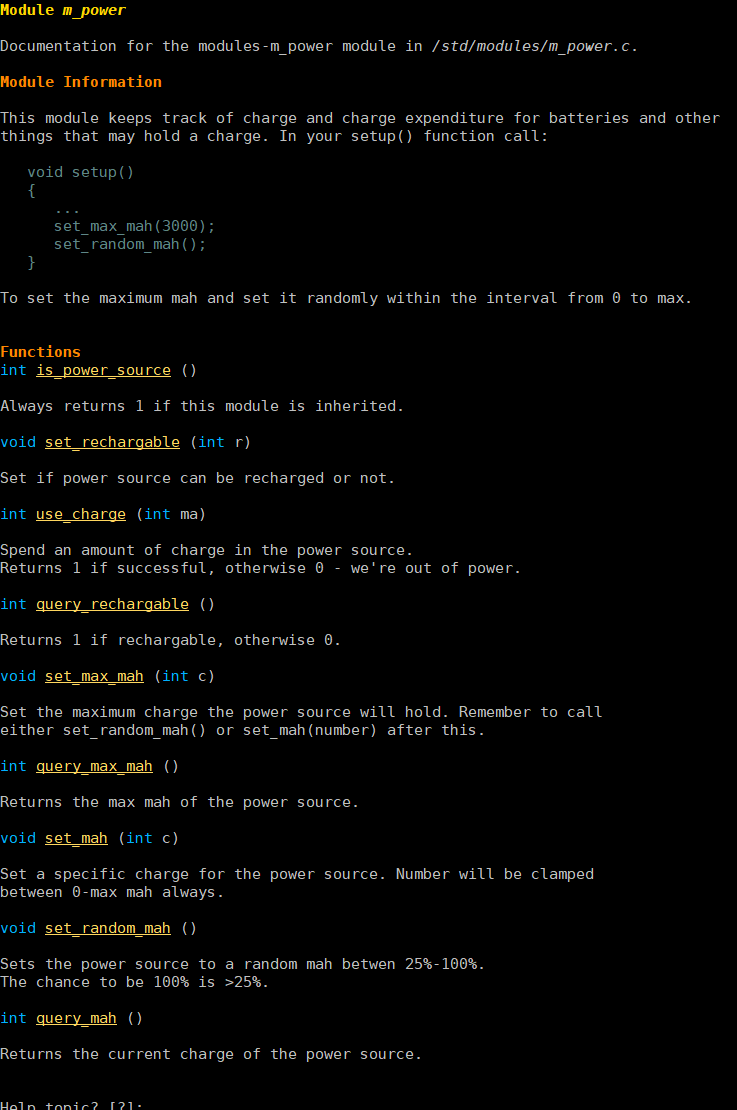
Has creating a ‘who’ command ever been easier? Useful module documentation to read:
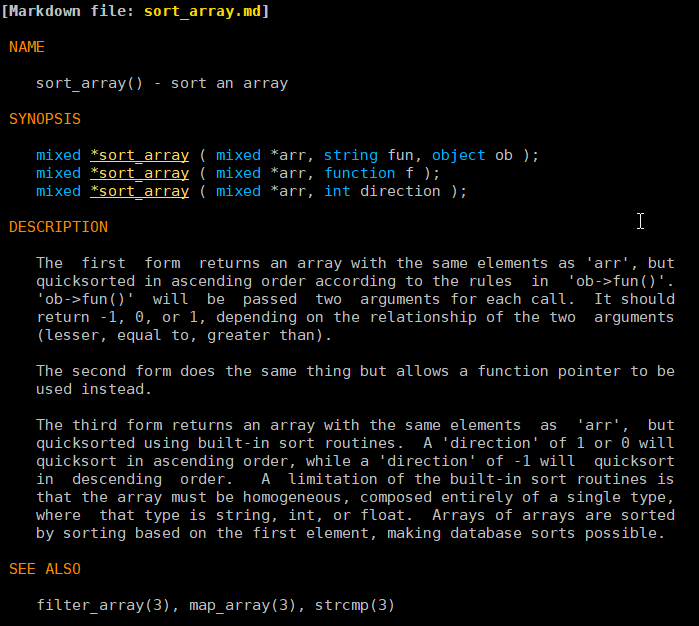
Marked up documentation
The auto documentation system in LIMA (which was orignally inspired by JAVA), collects mark-up from source files, and creates help pages and fills the help system with topics. Two types of files exist:
Markdown, or .md are files typically copied from the driver and are mostly for Wizards.
Example of a reStructured text file. The viewer highlights searched terms as well.
And reStructured Text, or .rst files are documentation for player commands, wizard commands and more. They provide coloured mark up on the MUD, as well as online (here).
Example of a driver contributed markdown file.
The wizard apropos command will provide a list of help pages and functions that match the query, and a following ‘man add_start’, e.g., will then bring up the entire help page for module m_conversation <module/modules-m_conversation>.
Developer information
For more on what you need to do, to continue to use the auto documenation system, see the page on the AUTODOC system.
Menu driven configuration
A lot of options in the mudlib can be configured via config files under /include/config/. All these files have a special format that includes instructions for range of values, default values and more.
// Each skill will start at 0, and go to this number of points.
// Default: 10000
// Range: 5000-30000
// Type: integer
#define MAX_SKILL_VALUE 10000
All the config files can modify the mudlib in fundamental ways, and can be configure using the admtool command <command/admtool>.
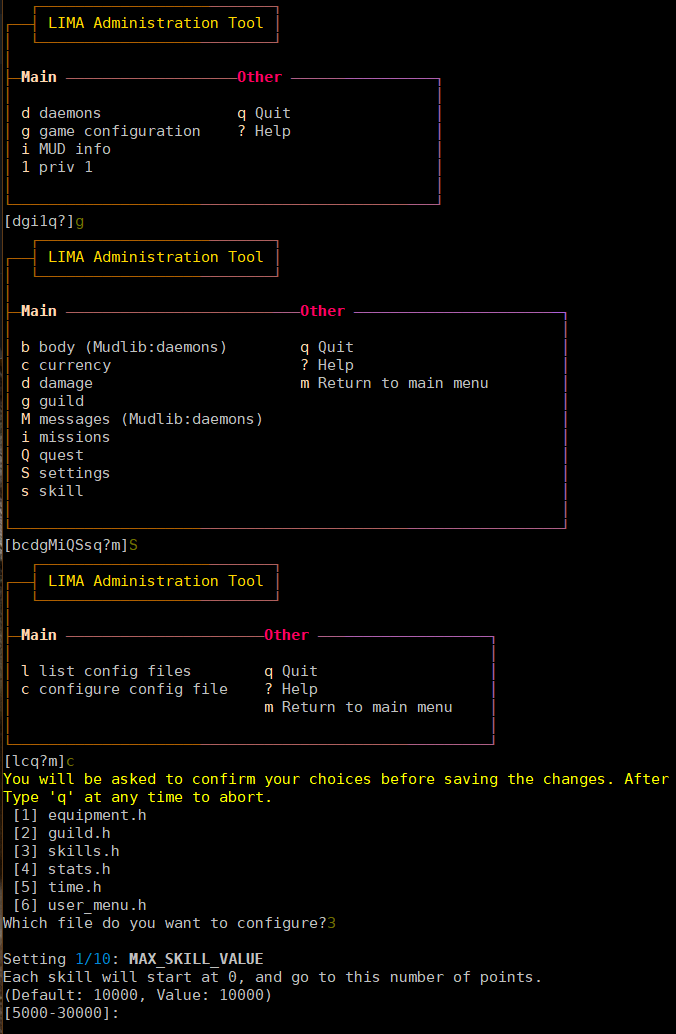
Example for configuring values via the admtool.
Developer information
Some settings may impact player .o files, so make sure you get the configuration right before opening up your MUD, e.g. changing MAX_SKILL_VALUE to 5000 will impact all players that already levelled up their skills above 5000, but some changes may break player files. Test your decisions carefully.
Your player files are not parsed and change for compatibility issues, we leave that to you.
Behaviour trees
The library contains a simple implementation of behaviour trees (this page is relied on for definitions and examples below) for monsters to make decisions. A simple set of nodes have been implemented, and can easily be extended:
Root node: Beginning of the tree.
Sequence node: A sequence will visit each child in order, starting with the first, and when that succeeds will call the second, and so on down the list of children. If any child fails it will immediately return failure to the parent. If the last child in the sequence succeeds, then the sequence will return success to its parent.
Selector node: Will return a success if any of its children succeed and not process any further children.
Succeeder node: A succeeder will always return success, irrespective of what the child node actually returned
Leaf nodes: Leaves do actions for us and return success or fail.
Invertor node: Reverses the result of a previous node.
Repeat until fail node: Keep doing something until it fails.
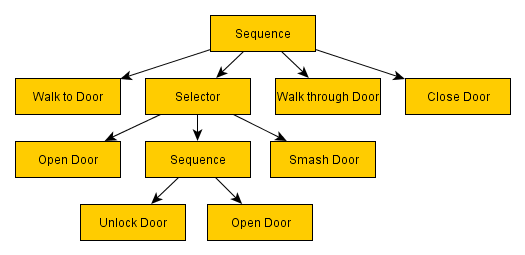
Behavior tree example, credit goes to Lemmy’s blog on the above link.
Developer information
The mudlib contains predefined behaviour clusters that can be included in the overall behaviour tree. Here is an example from the equipment_cluster:
  void init_equipment_cluster()
{
   // If any of these ones return true we stop here, and navigate somewhere else
   create_node(NODE_SELECTOR, "equipment_seq", ({"upgrade_true", "hurt", "find_heal"}));

   // Add equipment sequence to root sequence.
   add_child("root_sequence", "equipment_seq");
   create_node(NODE_SUCCEEDER, "upgrade_true", ({"upgrade_seq"}));

   //Look for better armour
   create_node(NODE_SELECTOR, "upgrade_seq", ({"find_armour_in_inventory", "find_armour_in_room"}));

   //Heal ourselves if needed
   create_node(NODE_SEQUENCE, "hurt", ({"safe_to_heal", "use_heal"}));
   create_node(NODE_SEQUENCE, "find_heal", ({"take_from_room", "use_heal"}));
   create_node(NODE_LEAF, "safe_to_heal");
   create_node(NODE_LEAF, "use_heal");

   //Can we find something useful to pick up?
   create_node(NODE_LEAF, "take_from_room");
   create_node(NODE_LEAF, "find_armour_in_inventory");
   create_node(NODE_LEAF, "find_armour_in_room");
}
The functions called above are defined in simple functions, that provide simple results like :doc:safe_to_heal()
used above in the tree branches defined in the cluster:
int safe_to_heal()
{
   string wounded = this_object()->badly_wounded() || this_object()->very_wounded();
   int targets = sizeof(query_targets() - ({0}));

   // We're not fighting
   return targets ? EVAL_FAILURE : EVAL_SUCCESS;
}
Scripting for NPCs
Traditional MUDs have a lot of NPCs just standing around, but let’s try to create an interactive living world! The module m_npcscript provides an easy way to script interactions for NPCs in your world, have them act (SCRIPT_ACTION), wait (SCRIPT_WAIT), and react to things that happen (SCRIPT_TRIGGER), take delays and change their in room descriptions (SCRIPT_DESC).
Developer information
This is an example of an NPC script, using the different options.
#Script for getting to the canteen and backACTION:hungryWAIT:30ACTION:(: set_for_sale, 0 :)ACTION:emote stands up.@@say Well:I guess it’s time for some lunch.ACTION:go south@@go east@@go east@@say Oh, there is the elevator.WAIT:10ACTION:push buttonTRIGGER:The elevator door opens.|The lamp briefly blinks.->go northwestACTION:hmmTRIGGER:The elevator door closes.->push 2TRIGGER:Elevator speaker says, “You have arrived at Cafeteria”.->go southeastACTION:go north@@go north@@go north@@say Hey Liam:how are you today?WAIT:30ACTION:say I’ll have the penne a la arrabiata@@emote swipes a card.@@go east@@emote sits down.WAIT:10ACTION:say Hello Dr. Nelson.WAIT:120ACTION:emote finishes his plate.@@emote stands up.@@go west@@go south@@go south@@go south@@push buttonTRIGGER:The elevator door opens.|The lamp briefly blinks.->go northwestACTION:hmmTRIGGER:The elevator door closes.->push 3TRIGGER:Elevator speaker says, “You have arrived at Landing Terminal”.->go southeastACTION:go west@@go west@@go north@@say Back at the office:hee hee!@@say So sorry, if I kept you waiting.ACTION:(:set_for_sale, 1:)ACTION:emote stands behind the counter again.@@say So… what can I do for you?
//Schedule the script to run every day at 11:45 game time.
create_script_from_file("demo", "scripts/demo.npcs");
EVENT_D->schedule_event("45 11 *", this_object(), "lunch");
By defining the recover() function in your NPC, you can allow them to stop being stuck somewhere. The documentation
for setting number of minutes before rescue and the recover function is described in
the module m_npcscript. The NPC-script files are documented here as well.
The scripts command gives an overview of scripts currently running and what the NPCs are doing:

Scripts command example, a quick overview of what’s happening and which scripts are running.
void recover()
{
   object canteen_room = load_object("/domains/std/room/Wizroom");
   tell_from_outside(environment(this_object()), "Liam Johnson hurries back to the canteen.");
   this_object()->move(canteen_room);
}
The main objective of the recover() function is to return the NPC back to the original position.